ChatGPT から接続する
ChatGPT にシフト屋さんを接続すると、話しかけるだけでシフト表を作成・調整できます。 「9月の第1週、早番・遅番・夜勤で4人。夜勤明けは休みにして、夜勤は公平に」のように頼めます。
ご利用には ChatGPT 側の設定が必要です
- Developer mode を有効にします(手順2で行います)
- ChatGPT の有料プランが必要です。 対応プランは OpenAI 側で変わるため、 OpenAI のヘルプで最新をご確認ください
- 提供は段階的です。お使いの地域や時期によっては、 設定項目がまだ表示されないことがあります
設定が見当たらない場合は、Actions を使う方法をご覧ください。 こちらは上記の設定なしでご利用いただけます。
接続の手順
-
設定を開く
ChatGPT にログインし、画面左下のアカウントメニューから Settings を開きます。
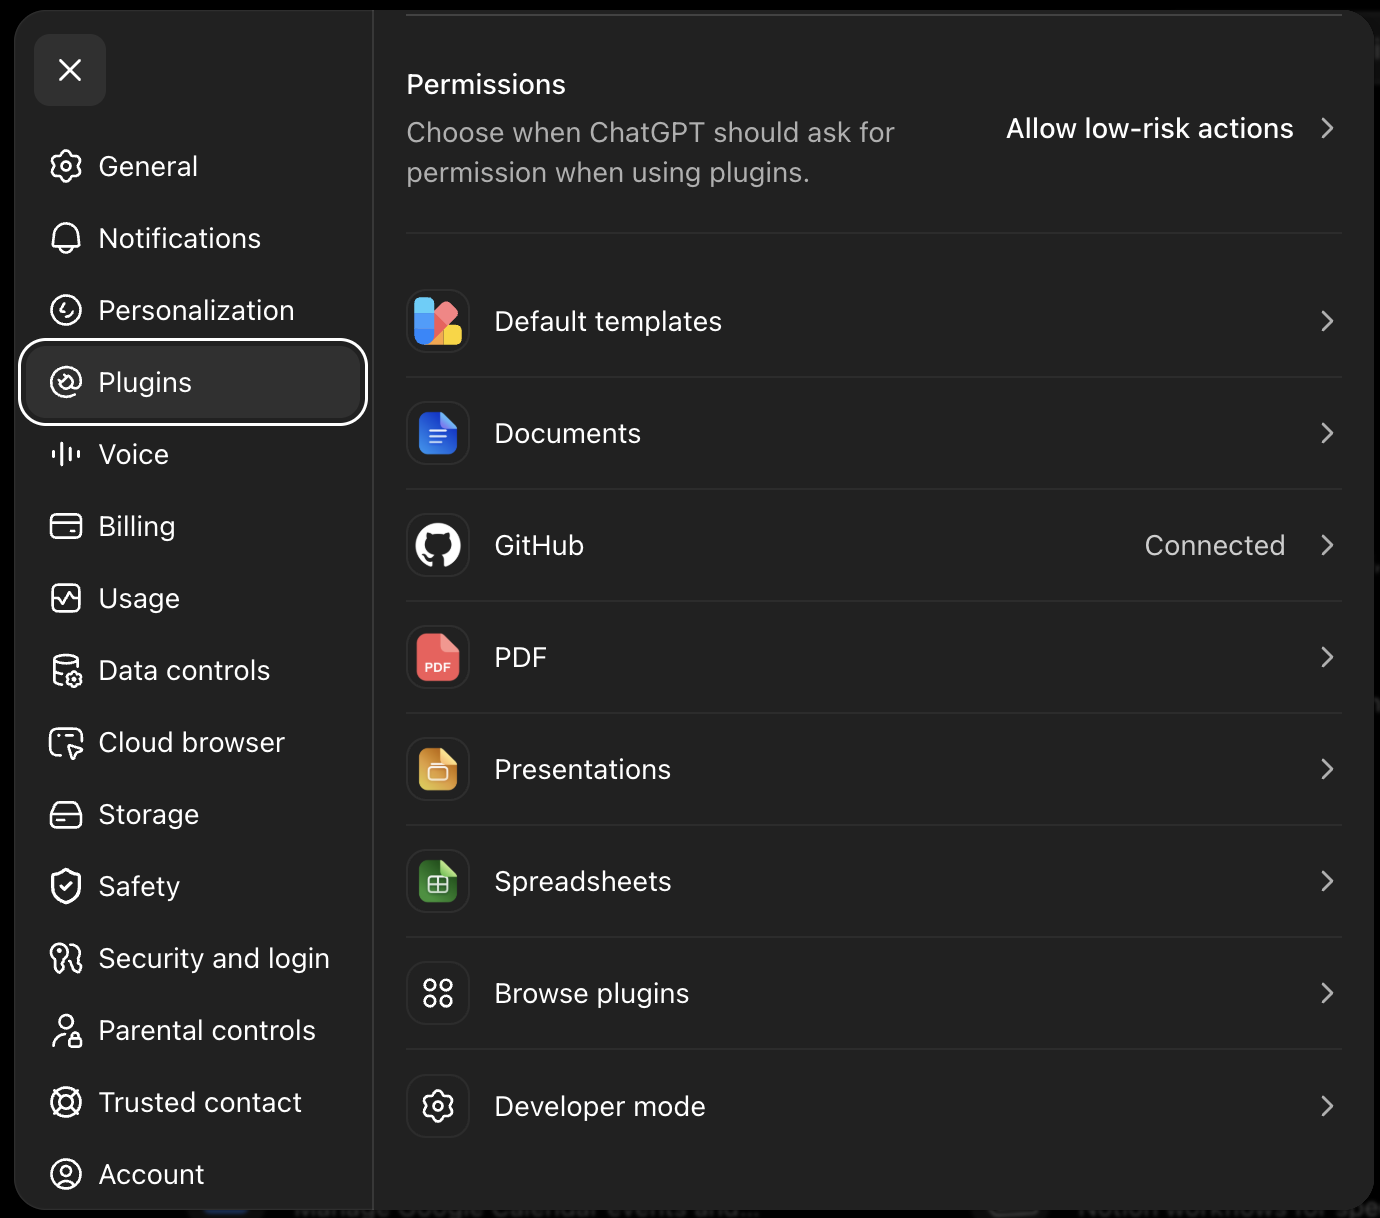
設定の左メニューから Plugins を選びます。 -
Developer mode を有効にする
Settings の Plugins にある Developer mode を ON にします。
⚠️ 項目名と場所は OpenAI 側で変わることがあります。見当たらない場合は、 プランか提供地域の制限に当たっています。
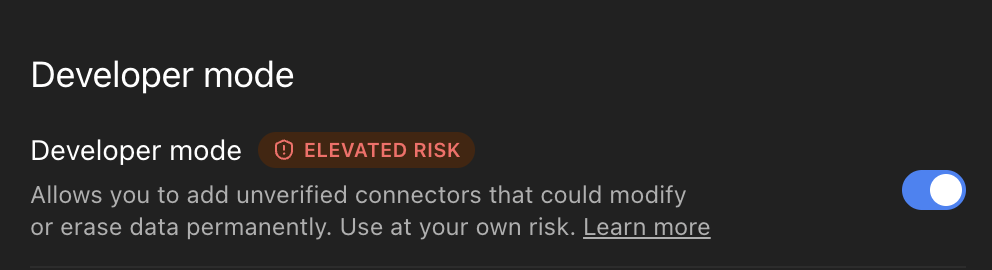
Plugins の一番下にある Developer mode をオンにします。 -
プラグインの追加画面を開く
左のナビゲーションから Plugins を選び、画面右上の + ボタンを押します。
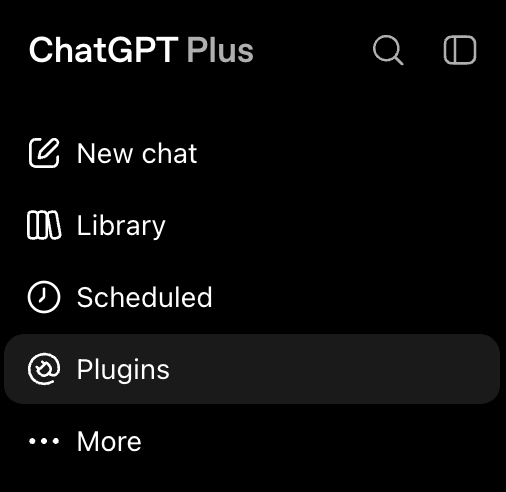
Developer mode をオンにすると、左のサイドバーに Plugins が出ます。 -
接続先を入力する
New Plugin ダイアログで、次のとおり入力します。
Name 任意(例: Shiftyasan)Connection Server URL を選び、 https://api.shiftyasan.com/mcpAuthentication OAuth Icon と Description は任意です。Advanced OAuth settings は開かなくて構いません (シフト屋さん側が自動で応答します)。API キーの入力も不要で、接続時に自動で用意されます。
最後に 「I understand and want to continue」にチェックして Create を押します。チェックしないと作成できません。
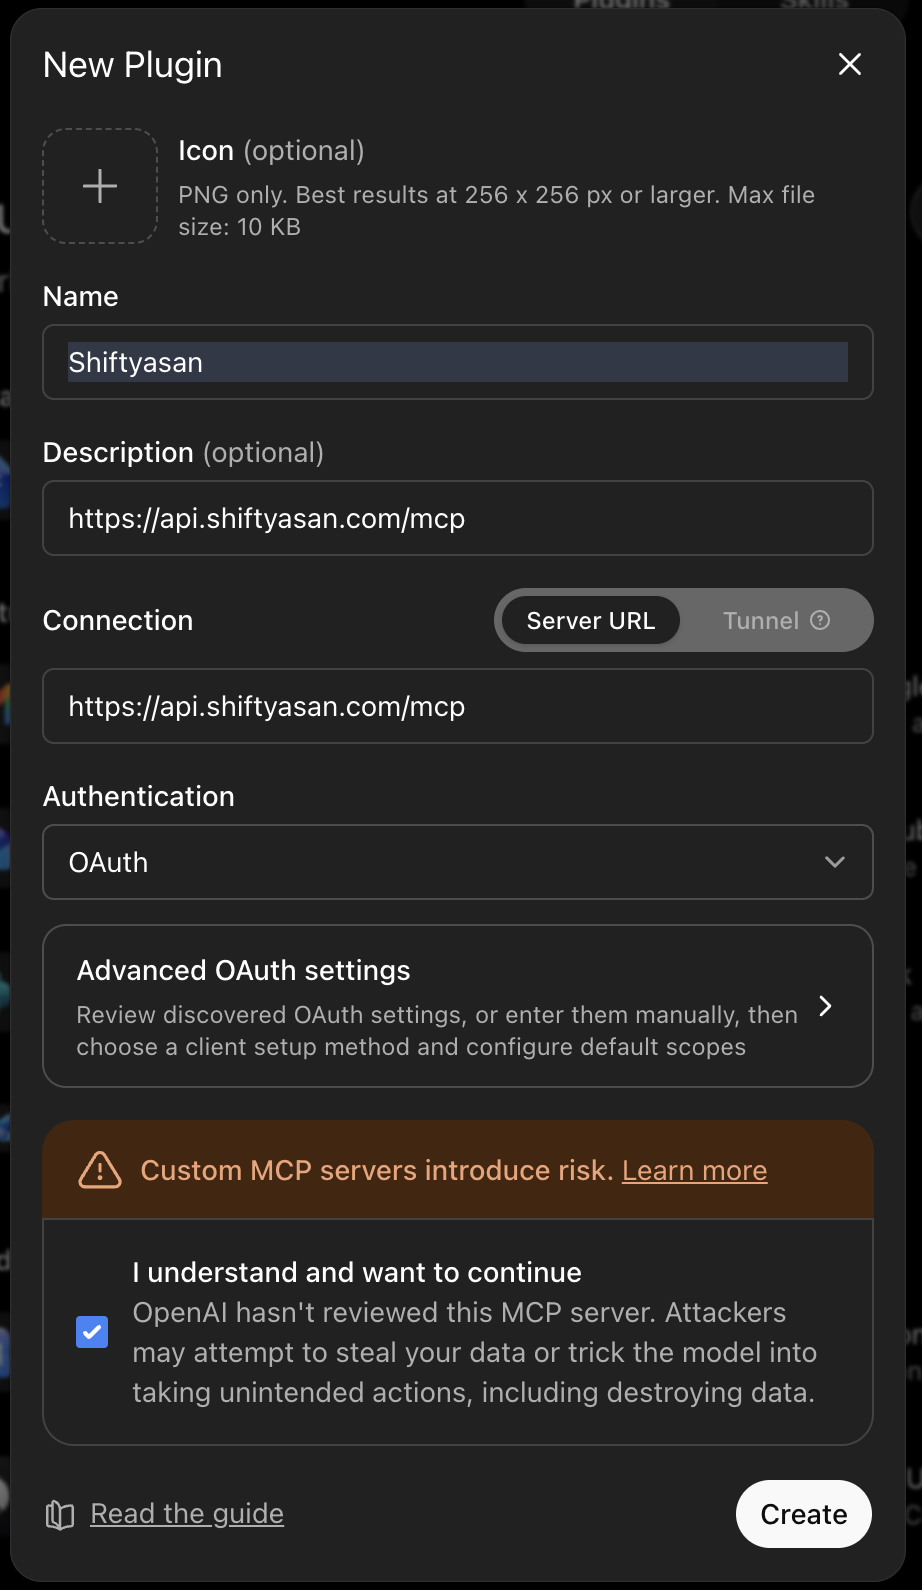
入力後、「I understand and want to continue」にチェックして Create。 -
シフト屋さんにログインする
ブラウザでシフト屋さんのログイン画面が開きます。 メールアドレスとパスワード、または Google アカウントでログインしてください。
シフト屋さんのアカウントをお持ちでない場合は、 こちらから新規登録できます。
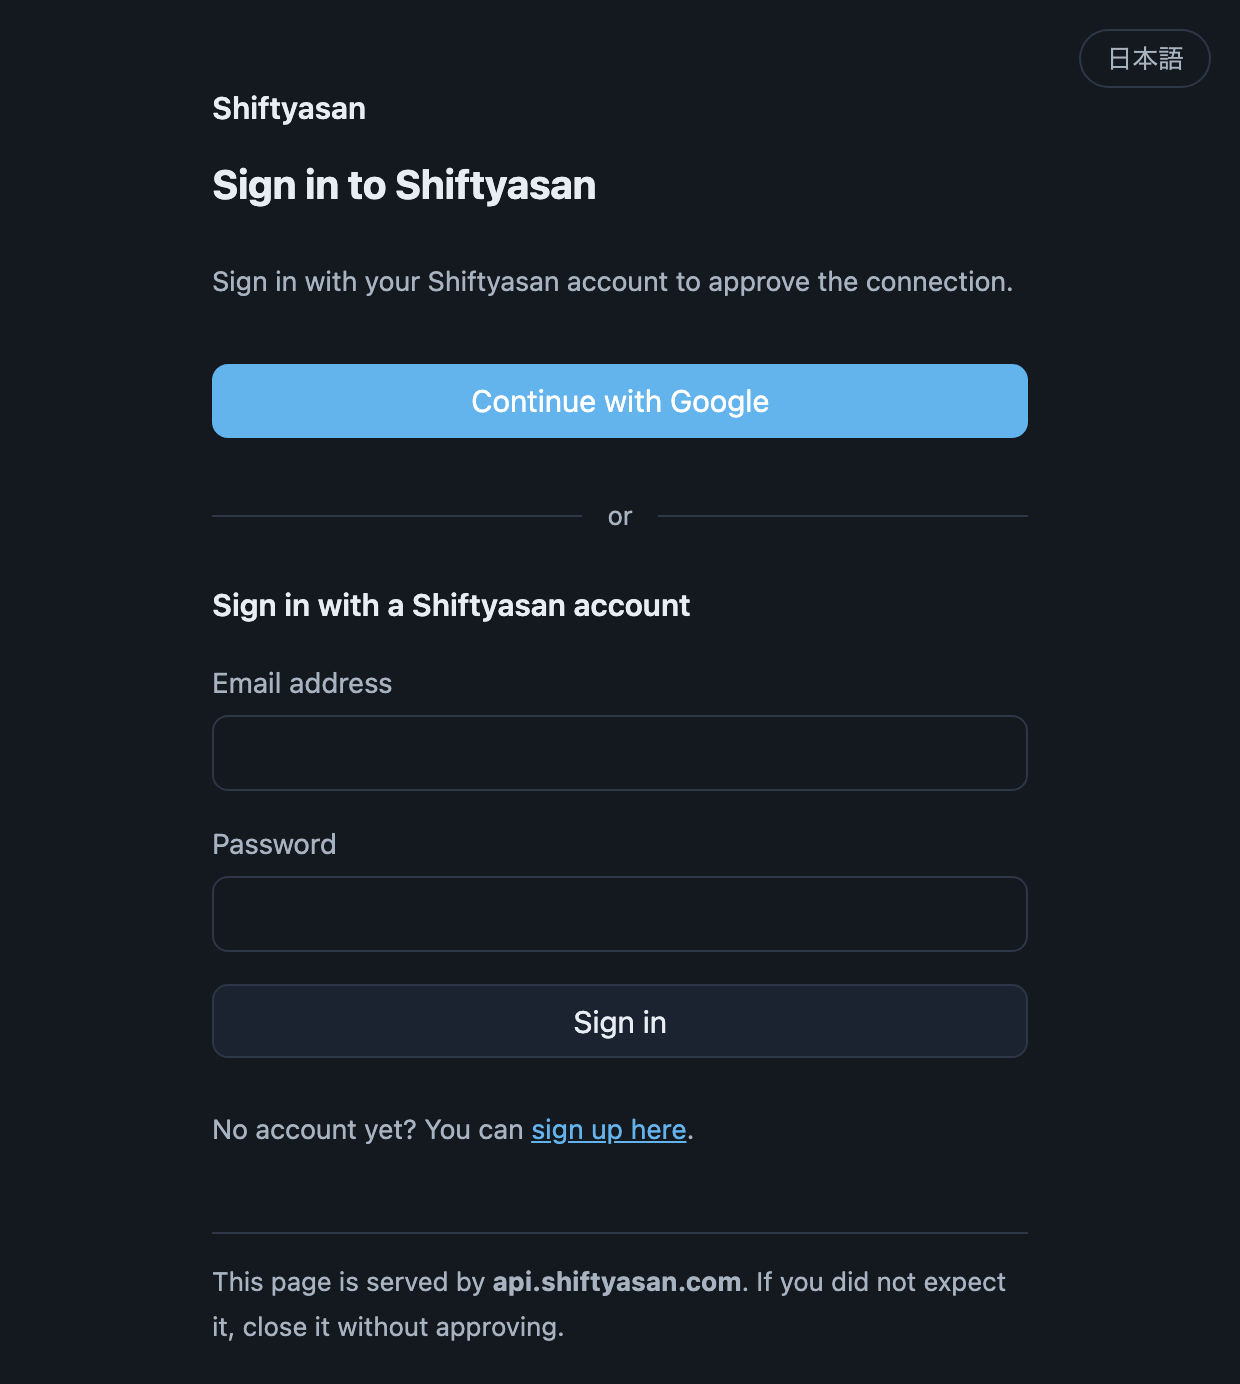
api.shiftyasan.com のログイン画面(英語表示の例)。Google が主経路です。日本語のブラウザでは日本語で表示されます。 -
接続を許可する
許可の画面に、ログイン中のメールアドレスと接続の許可情報の送り先が 表示されます。どちらもご自身が意図したものであることを確認して「許可する」を押してください。
⚠️ 身に覚えのない送り先が表示されている場合は、許可せずに閉じてください。
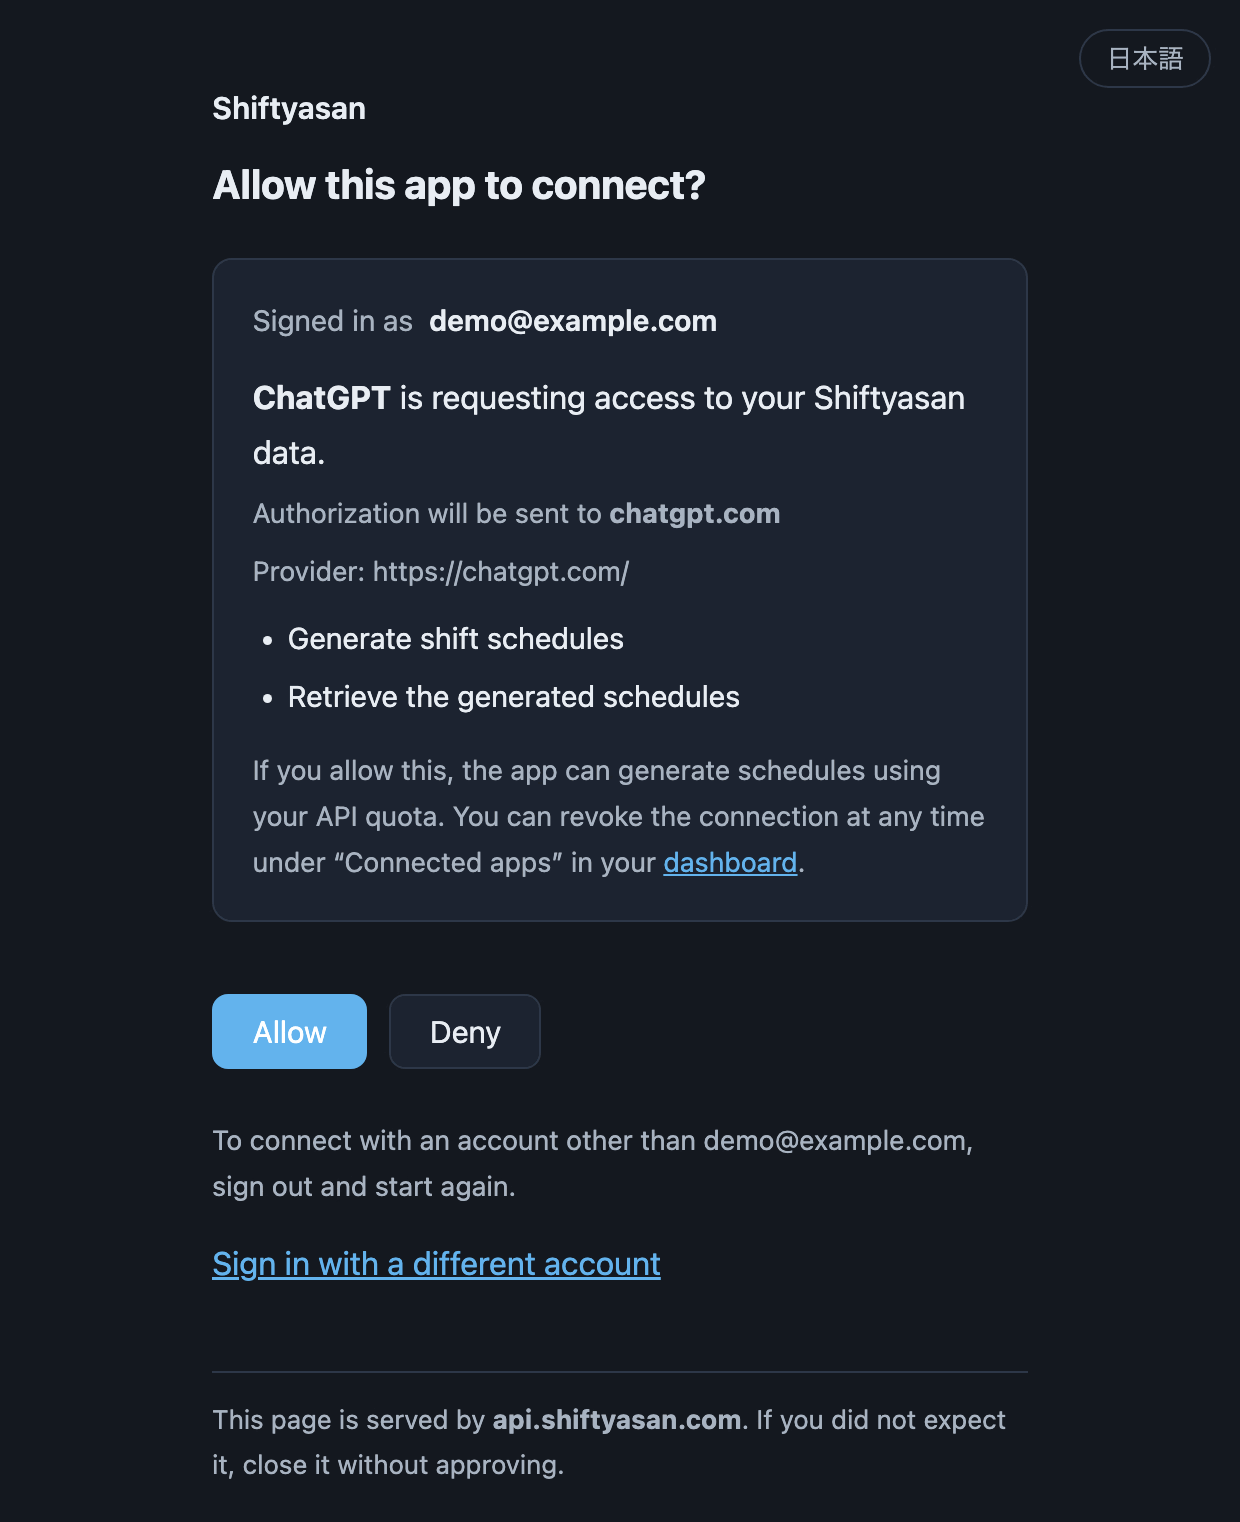
許可画面(英語表示の例)。ログイン中のアカウントと、許可情報の送り先を必ず確認してください。 -
使ってみる
接続が完了したら、チャットでそのまま頼めます。
9月1日から7日まで、早番・遅番・夜勤の3種類で
4人のシフトを組んで。夜勤明けは必ず休みにして、
夜勤の回数はできるだけ公平にして。
API キーは接続時に自動で用意されます。すでにお持ちの場合はそれが使われます。
うまくいかないとき
設定に Plugins や Developer mode が見当たらない
一番多い原因です。プラン・提供地域・段階的な提供のいずれかに当たっています。 設定項目の場所も変わることがあるため、 OpenAI のヘルプで ご利用のプランが対象かを確認してください。 対象外の場合は、下の Actions を使う方法で同じことができます。
URL を入れるとエラーになる
末尾のスラッシュや余分な空白が入っていないか確認してください。正しくは
https://api.shiftyasan.com/mcp です。
https://api.shiftyasan.com/mcp/ や /v1/public/mcp ではありません。
ログイン画面が開かない・許可しても戻ってこない
ブラウザのポップアップブロックや、複数アカウントでのログイン状態が原因のことがあります。 一度プラグインを削除し、シークレットウィンドウでやり直すと切り分けられます。 それでも直らない場合は [email protected] までご連絡ください。
接続はできたのに、シフトを作ってくれない
「シフト屋さんを使って」と明示すると呼び出されやすくなります。 また、必要な情報(期間・シフトの種類・人数・誰がどのシフトに入れるか)が足りないと、 エージェントが質問を返してきます。埋めていけば作成に進みます。
Actions を使う方法(Developer mode が使えない場合)
プラグインが使えない環境でも、Custom GPT の Actions で同じ機能を利用できます。 こちらは API キーをご自身で発行して設定します。
-
API キーを発行する
ダッシュボードで
sk_live_...のキーを発行します。 -
Custom GPT に取り込む
My GPTs → Create a GPT → Configure → Actions → Import from URL で次を取り込みます。
https://api.shiftyasan.com/v1/public/openapi.json -
認証を設定する
Authentication → API Key → Bearer を選び、発行したキーを貼り付けます。
-
Instructions に追記する
次を書いておくと自律的に動きます。
solve_shift の前に必ず validate_shift_input を呼ぶ。
202 と job_id が返ったら get_solve_job を約15秒間隔で
completed か failed になるまでポーリングする。
接続を解除するには
ダッシュボードの 「接続しているアプリ」から、いつでも個別に解除できます。 解除すると、そのアプリからのアクセスだけが止まります。
← Shiftyasan Public API / MCP guide
Connect from ChatGPT
Once connected, you can build and adjust schedules by asking — for example "Schedule 4 people across early, late and night shifts for the first week of September. Give a day off after each night shift, and share night shifts fairly."
A little setup is needed on the ChatGPT side
- Turn on Developer mode (step 2 below)
- A paid ChatGPT plan is required. Which plans qualify changes on OpenAI's side — check OpenAI's help centre for the current answer
- The feature ships gradually. Depending on your region and timing, the setting may not have reached your account yet
If you cannot find the setting, see Using Actions instead — that route works without any of the setup above.
Setup
-
Open Settings
Sign in to ChatGPT, then open Settings from the account menu in the bottom left.
Choose Plugins in the settings menu. -
Turn on Developer mode
In Settings, open Plugins and turn on Developer mode.
⚠️ The wording and location change on OpenAI's side. If it is not there at all, you are hitting a plan or region restriction.
Turn on Developer mode at the bottom of Plugins. -
Open the new plugin screen
Choose Plugins in the left navigation, then press the + button in the top right.
With Developer mode on, Plugins appears in the sidebar. -
Enter what to connect to
Fill in the New Plugin dialog as follows.
Name Anything you like (for example Shiftyasan)Connection Keep Server URL selected, then https://api.shiftyasan.com/mcpAuthentication OAuth Icon and Description are optional, and you can leave Advanced OAuth settings closed — Shiftyasan answers those automatically. No API key is needed either.
Finally, tick “I understand and want to continue” and press Create. It will not create without the tick.
Tick “I understand and want to continue”, then press Create. -
Sign in to Shiftyasan
A Shiftyasan sign-in page opens in your browser. Sign in with your email and password, or with Google.
No account yet? You can sign up here.
The sign-in screen on api.shiftyasan.com. Google is the main route. -
Approve the connection
The approval screen shows which account you are signing in as and where the authorization will be sent. Check both, then approve.
⚠️ If the destination is unfamiliar, close the page without approving.
Check both the account you are signed in as and where the authorization goes. -
Try it
Once connected, just ask in the chat.
Schedule 4 people from September 1st to 7th across early,
late and night shifts. Always give a day off after a night
shift, and share night shifts as evenly as possible.
An API key is provisioned automatically when you connect. An existing one is reused.
Troubleshooting
I cannot find Plugins or Developer mode in Settings
This is the most common problem: you are hitting a plan, region, or rollout restriction. The location of the setting also moves. Check OpenAI's help centre for whether your plan qualifies. If it does not, Actions give you the same functionality.
The URL is rejected
Check for a trailing slash or stray whitespace. It is exactly
https://api.shiftyasan.com/mcp — not
https://api.shiftyasan.com/mcp/ and not /v1/public/mcp.
The sign-in page does not open, or approval never returns
A popup blocker or being signed in to several accounts can cause this. Remove the plugin and retry in a private window to narrow it down. If that does not help, email [email protected].
It connects, but never builds a schedule
Saying "use Shiftyasan" makes the tool call more likely. If required details are missing (dates, shift types, headcount, who can work which shift) the agent will ask for them — answer and it will proceed.
Using Actions instead (when Developer mode is unavailable)
You can get the same functionality through a Custom GPT with Actions. This path uses an API key you create yourself.
-
Create an API key
Issue an
sk_live_...key in the dashboard. -
Import into a Custom GPT
My GPTs → Create a GPT → Configure → Actions → Import from URL:
https://api.shiftyasan.com/v1/public/openapi.json -
Set authentication
Authentication → API Key → Bearer, then paste your key.
-
Add to Instructions
This makes the GPT drive the flow on its own:
Always call validate_shift_input before solve_shift.
If solve_shift returns 202 with a job_id, poll get_solve_job
every ~15 seconds until it is completed or failed.
Revoking a connection
You can revoke any connected app from the dashboard under "Connected apps". Revoking stops access from that app only.